My castella cake is so easy to make at home. I actually only use 5 ingredients to make this popular Japanese sponge cake. Light as air and perfectly sweetened by honey, this is a must try. Seriously, I don’t want to overstate the obvious, but honey lovers are in for a treat!
I’ve never taken a trip to Japan without having castella cake at least once. Even if I tried to avoid it, it would find its way into my stomach somehow. That’s a good thing! It’s so light, fluffy and spongy, I actually go looking for it pretty much as soon as the plane wheels touch down at the airport.
And, for years now, I’ve been making it at home from scratch for a couple of reasons – primarily because I love honey. In fact, my recipe calls for more honey than traditional castella recipes simply because I always crave more of that specific sweetness in my cake. But it also reminds me of my mom. She lives in Kyushu – not far from Nagasaki, the birthplace of castella cake. So there are always tons of options at the bakeries around her home. And we’ve enjoyed most of them!
Table of Contents
What is Castella (Kasutera)
Castella, pronounced kasutera (カステラ), is a Japanese confectionary with roots from Portugal. It’s a simple sponge cake made with flour, eggs, sugar and starch syrup – which is baked in a rectangular mold. This origins of this cake were introduce to Japan in the 16th century, from Portuguese missionaries who brought bread with them to the port city of Nagasaki. That Portuguese bread had a long shelf life, which meant sailors who were out at sea for months could store it for a long time. Over the years (centuries!) Japanese bakers tweaked it into the light, airy and sweet sponge cake it is today.
Ingredients
Scroll to the bottom of this page for the full recipe steps and measurements.
- Bread Flour: When I can, I use bread flour. It’s sometimes called strong flour. It has more protein than regular flour which I rely on to give my cake a higher rise and more elasticity. If you don’t have bread flour, don’t worry. You can use all-purpose flour instead. I’ve made it both ways and my castella was still moist and delicious.
- Sugar: I’m only using 6 tablespoons. The rest of the sweetness comes from honey.
- Eggs: 3 large eggs at room temperature. It’s very important that you don’t use cold eggs – as the temperature will affect the baking time. One way I quickly warm up my eggs: I place them in a bowl of warm water for a few minutes before using them.
- Honey: Try to use good honey for castella as it imparts more depth of flavor and floral notes to the cake. I find that raw organic honey has a more complex flavor that the stuff sold in plastic bears.
- Water: Just a tablespoon to loosen the batter.
- Salt: Salt is actually optional – but I find adding a pinch makes castella taste better.
How to Make Castella
- Preheat and pan prep. Preheating your oven to 320Fº. Brush a loaf pan with oil, or use cooking spray.
- Sift the flour. Sift the flour into a bowl and set aside.
- Start the batter. In a separate large bowl, crack the eggs and mix with a hand mixer. Add the sugar and turn the speed to high. Mix for 4-5 minutes until the color turns a pale yellow and the texture has thickened. Turn the speed down to 3 or 4 and mix in the honey, water, and salt.
- Add flour in batches. Add one third of the bread flour and mix. Repeat this step twice more until all the bread flour has been combined.
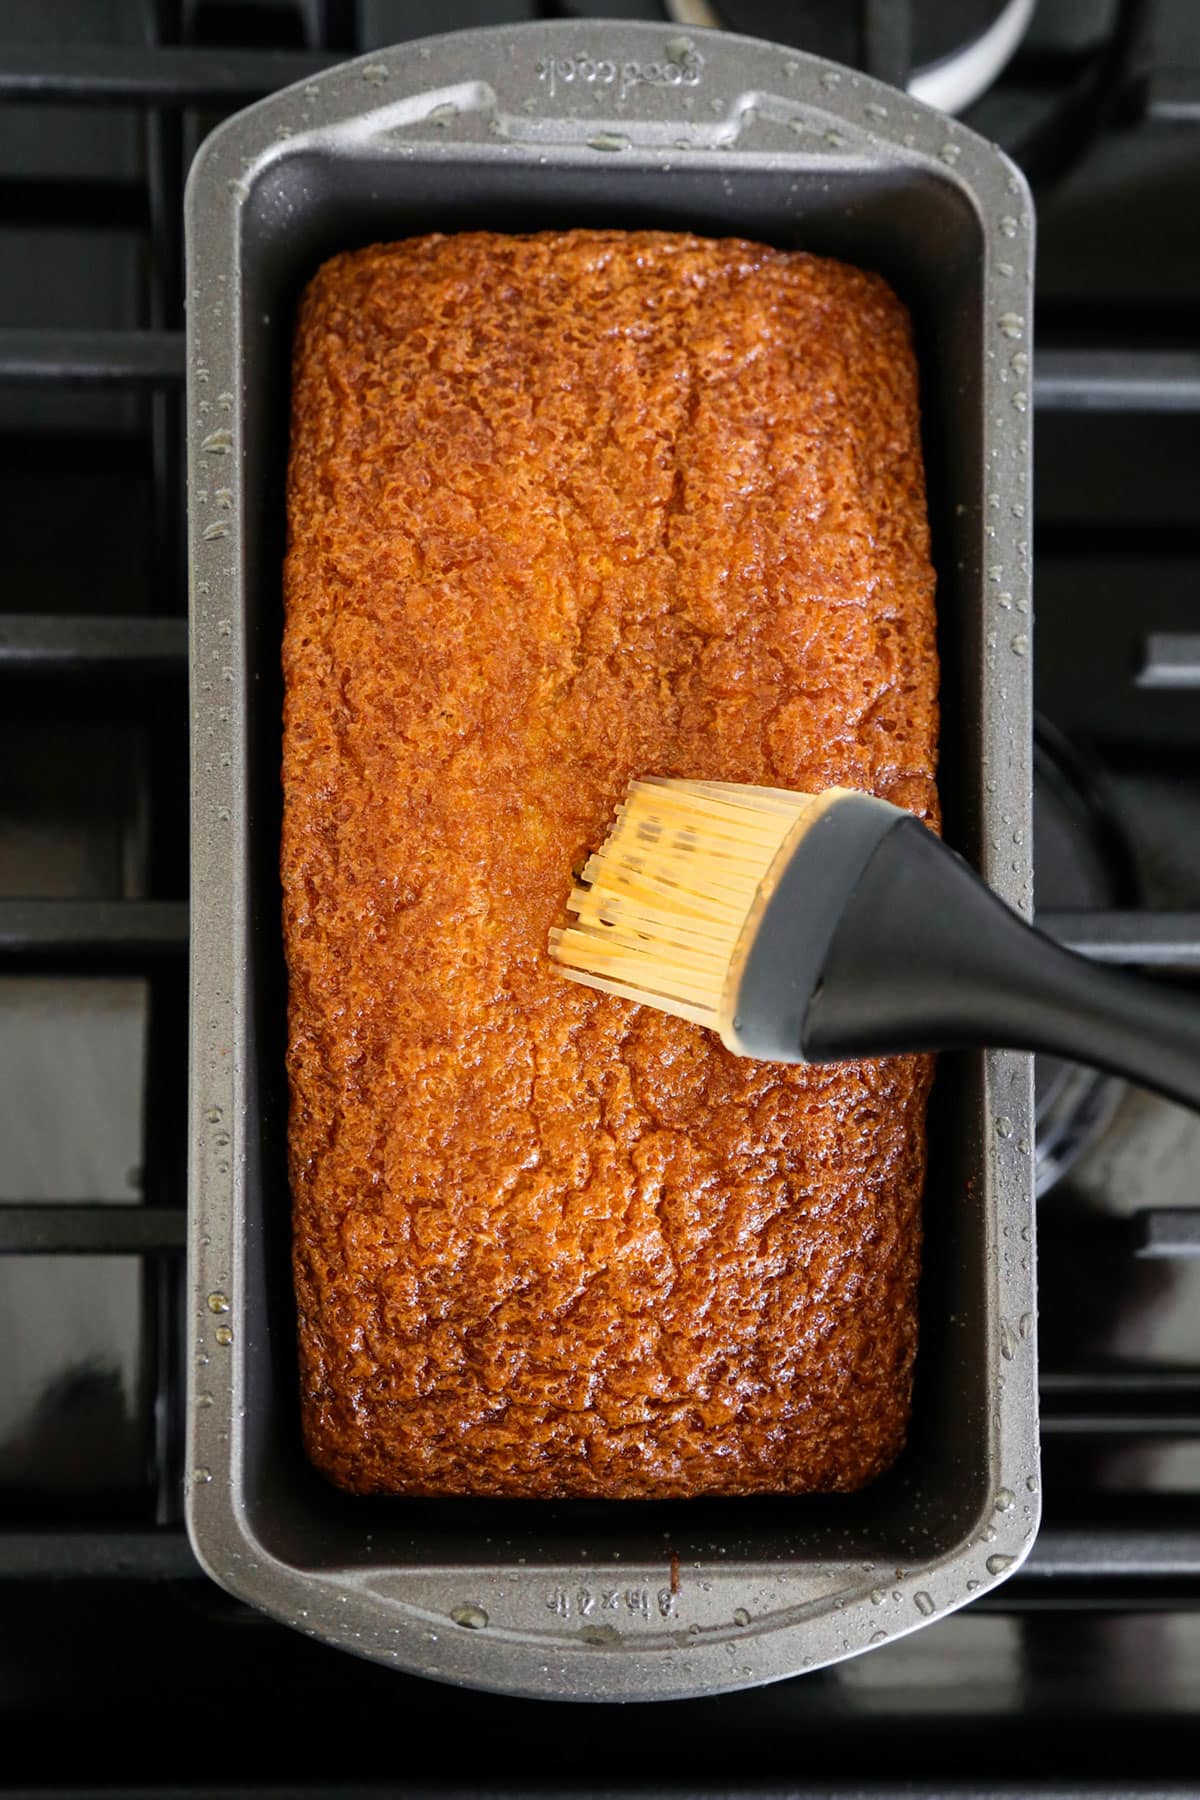
- Add batter to pan and bake. Pour the batter into the loaf pan and bake in the middle rack for 35-40 minutes. Remove from the oven once fully baked.
- Brush with honey. Mix 1 tablespoon honey with 1 teaspoon water and brush on top.
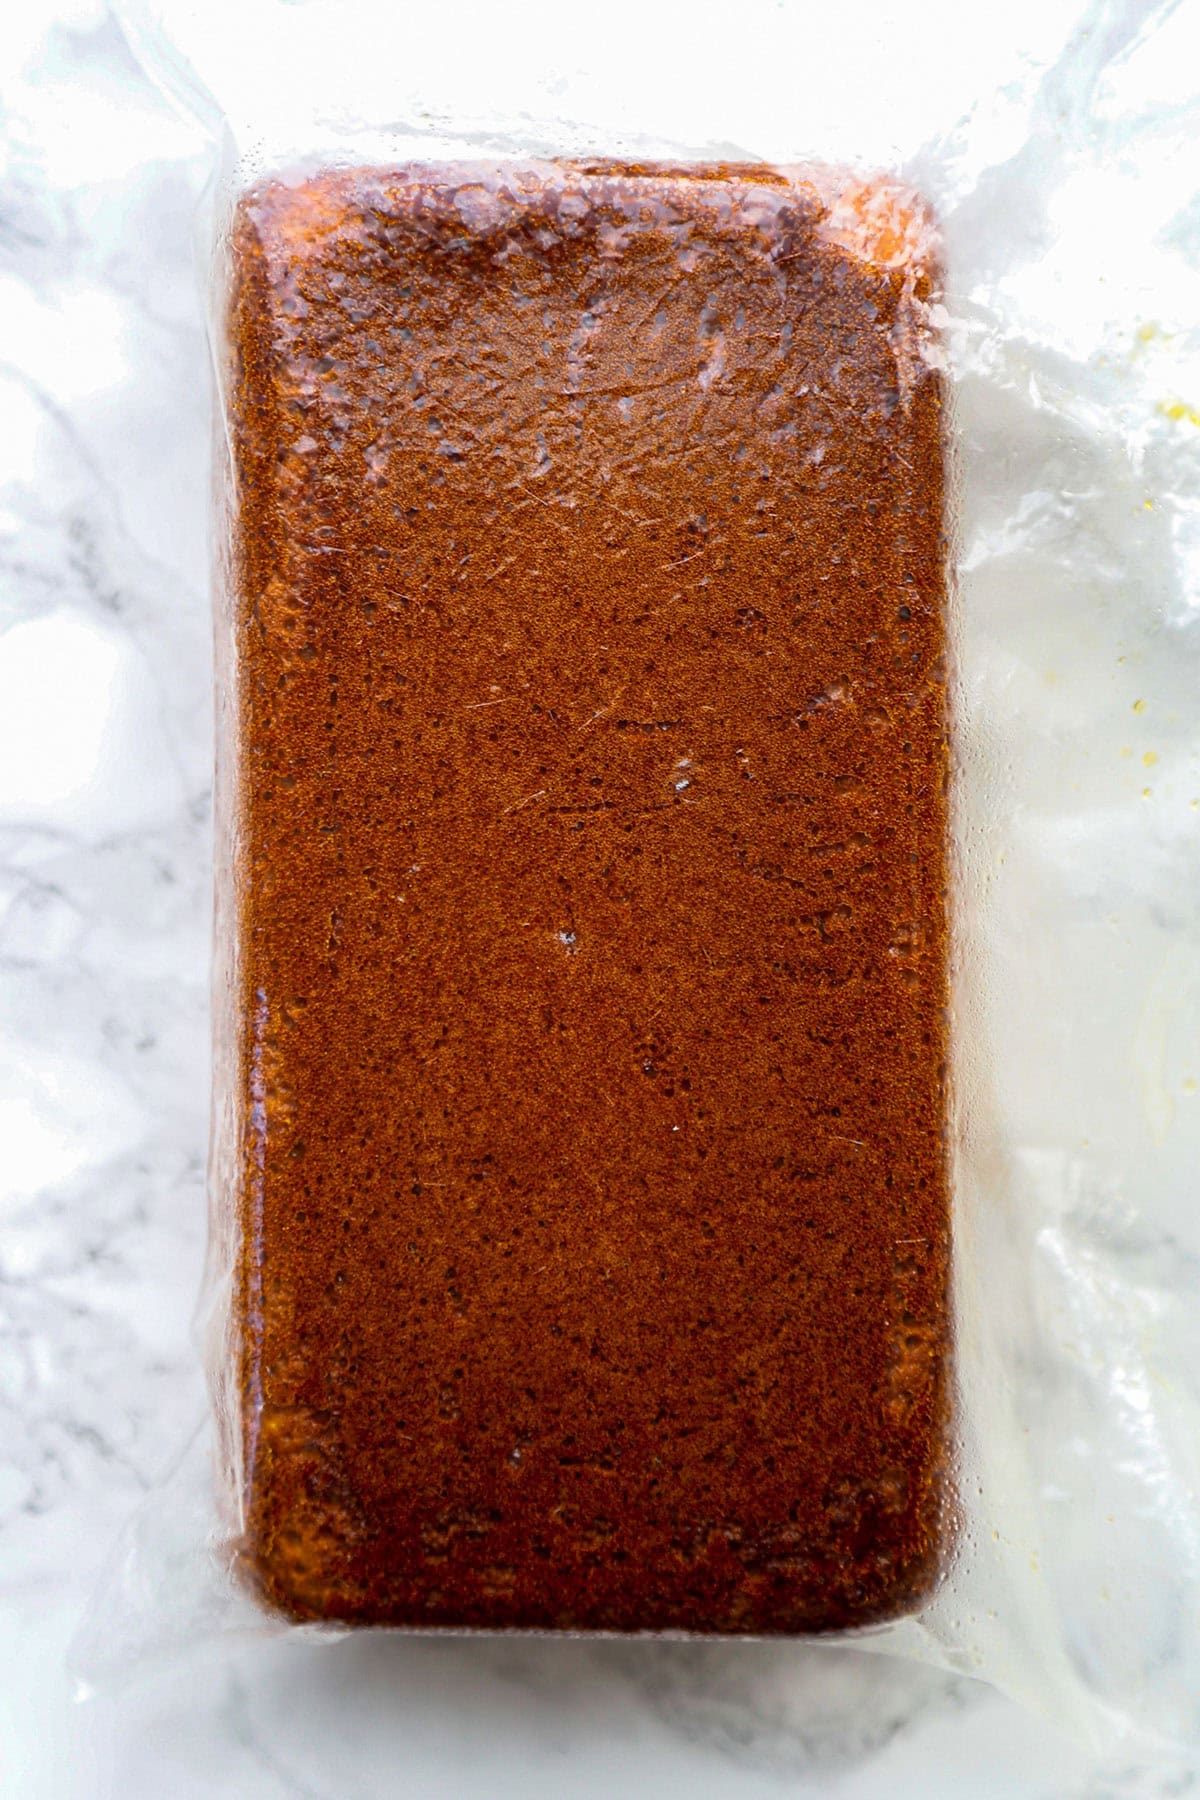
- Wrap the cake. Flip the cake over and place it in a food storage bag (so all sides are touching) while it’s still hot. Alternatively, wrap the cake in plastic wrap. Leave it on the counter for 12 hours.
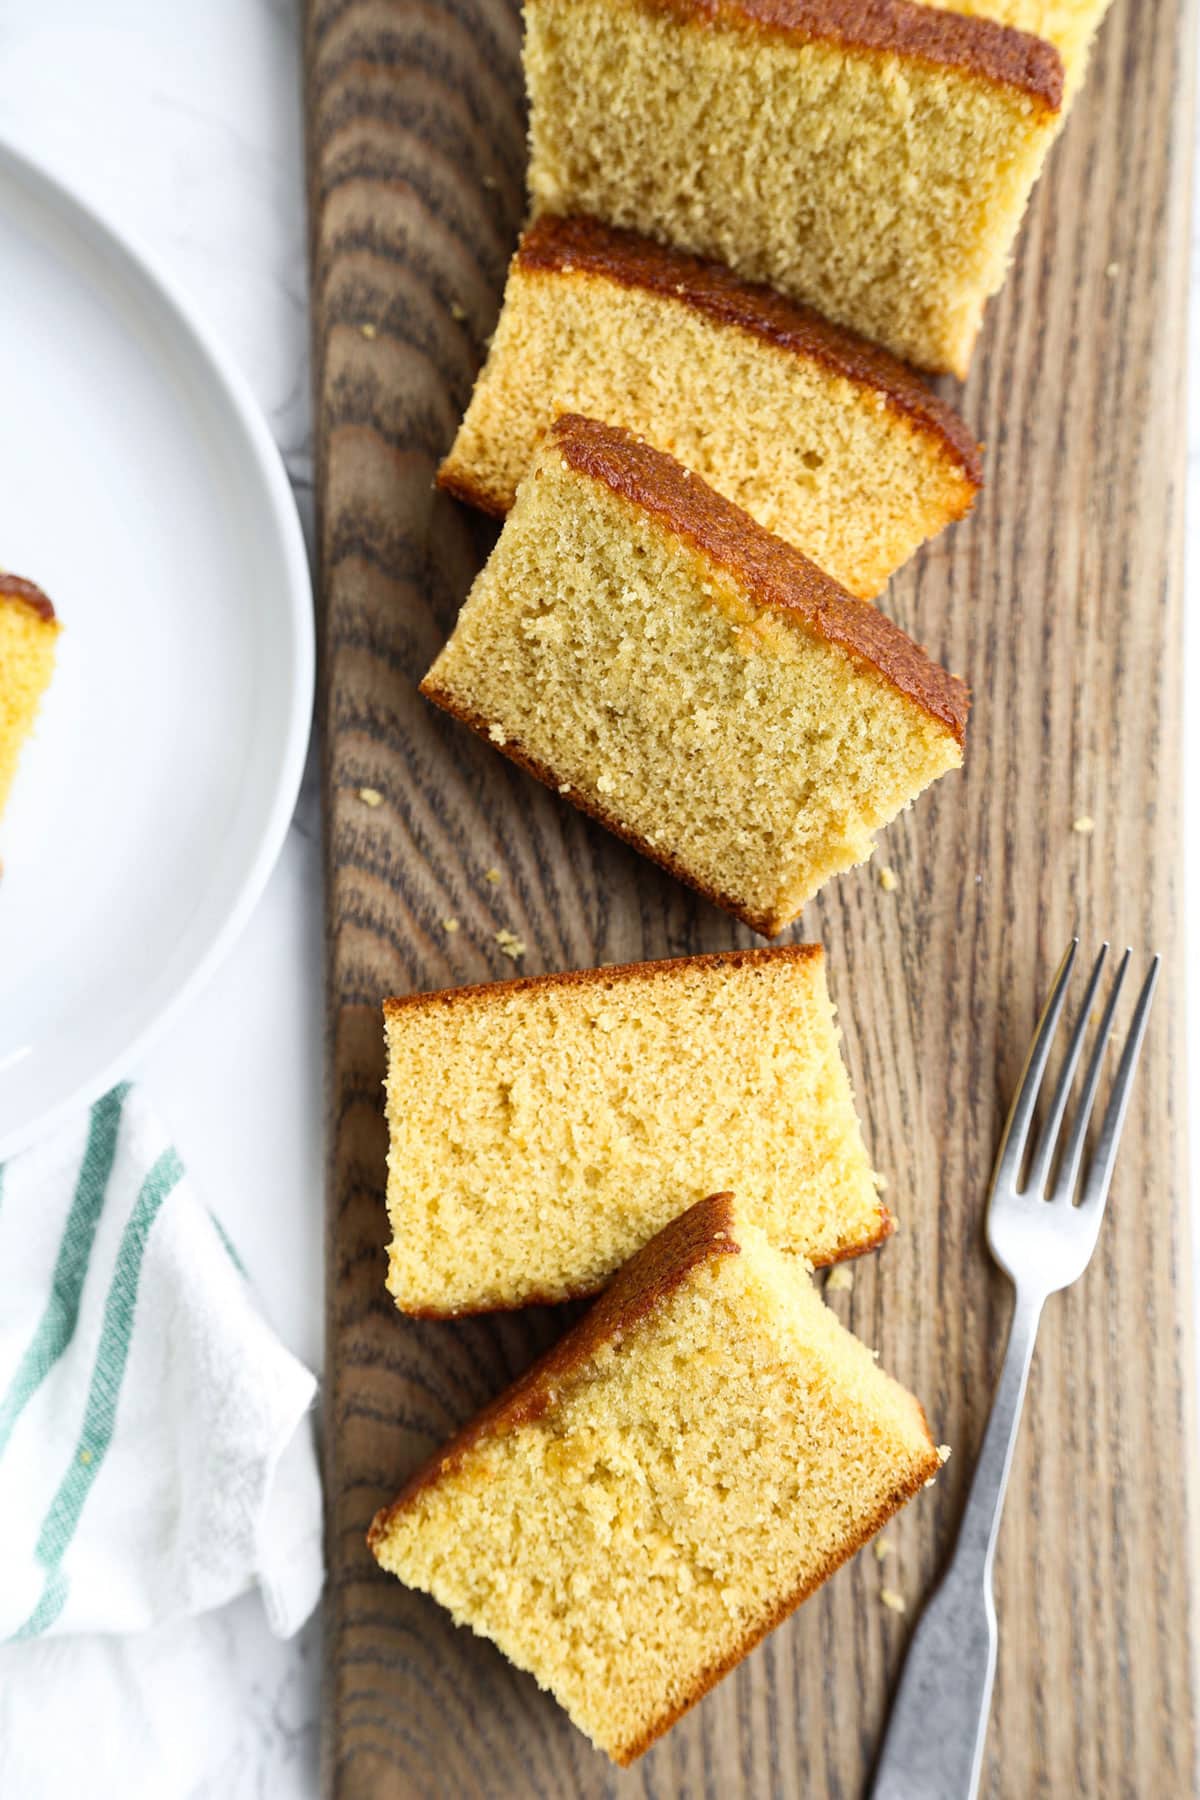
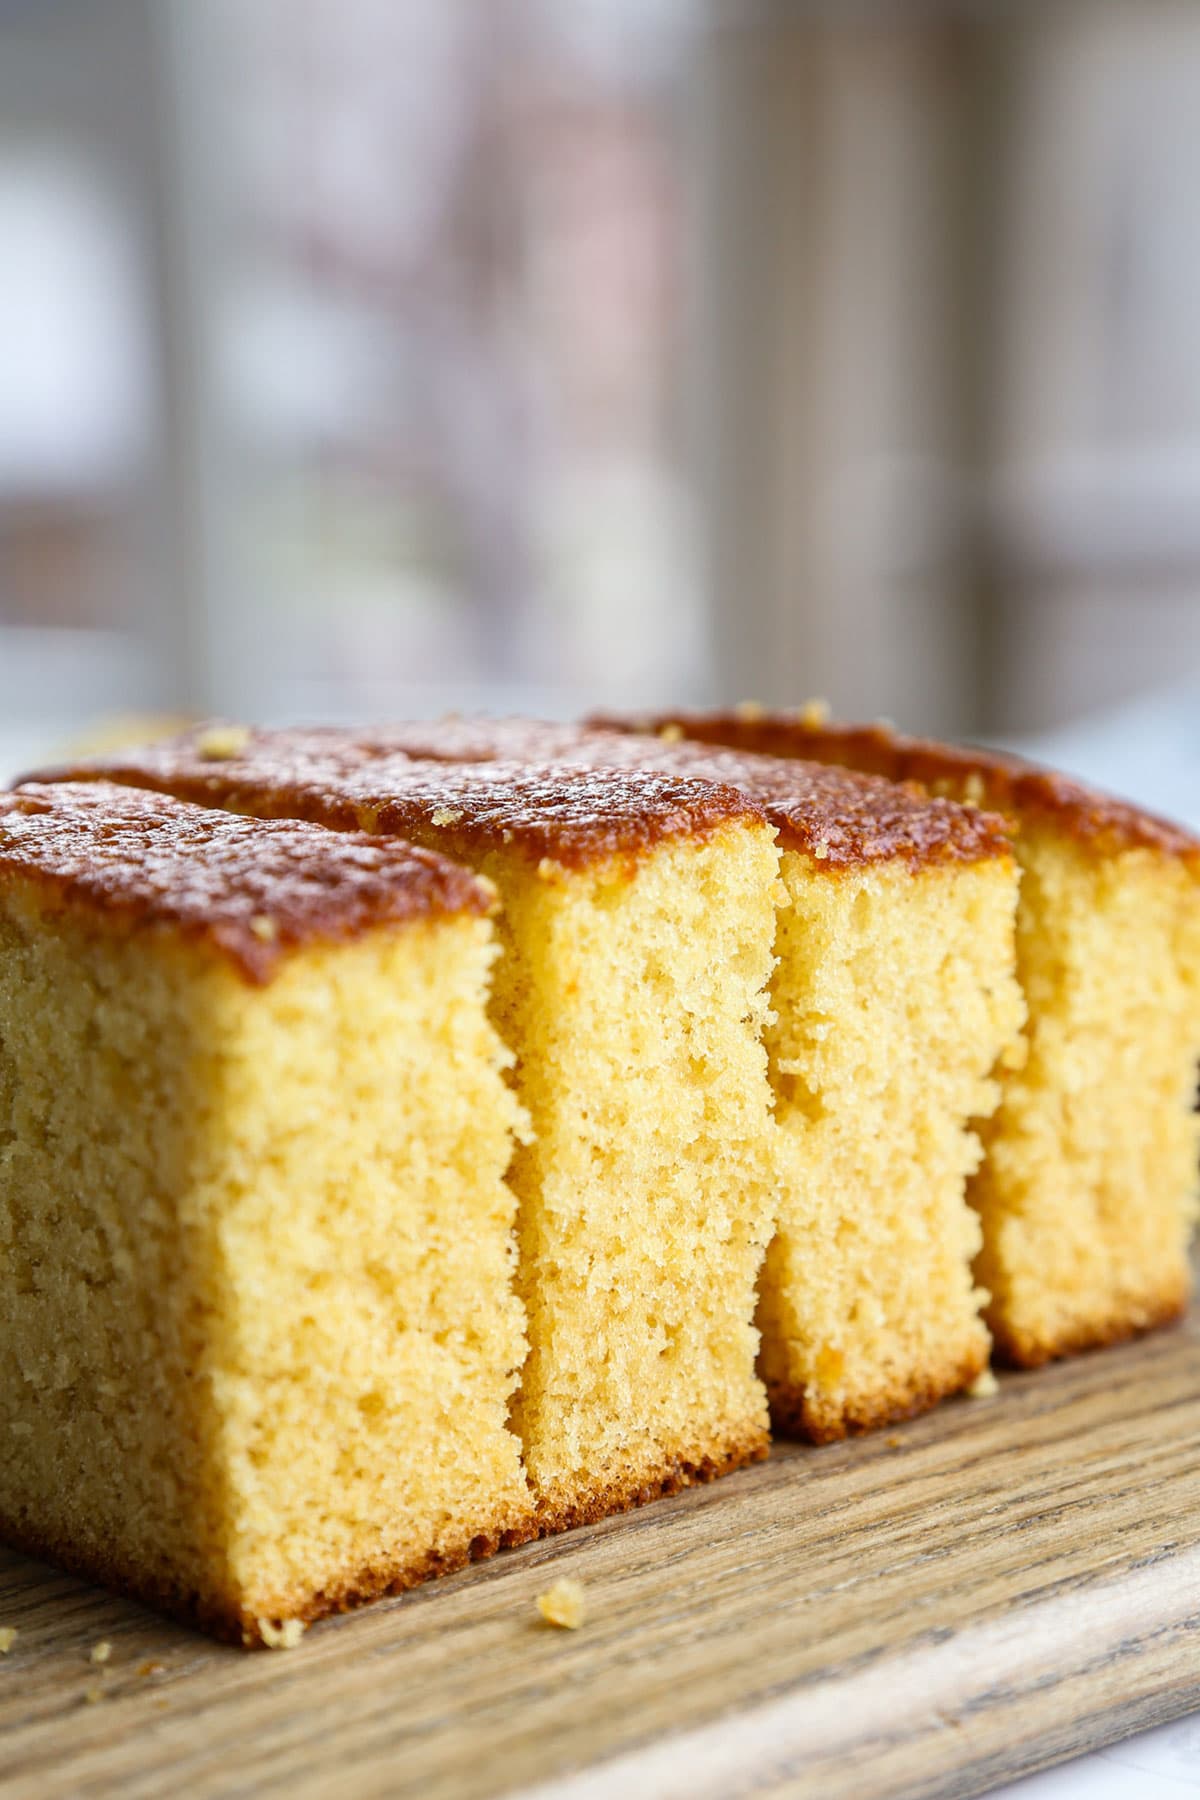
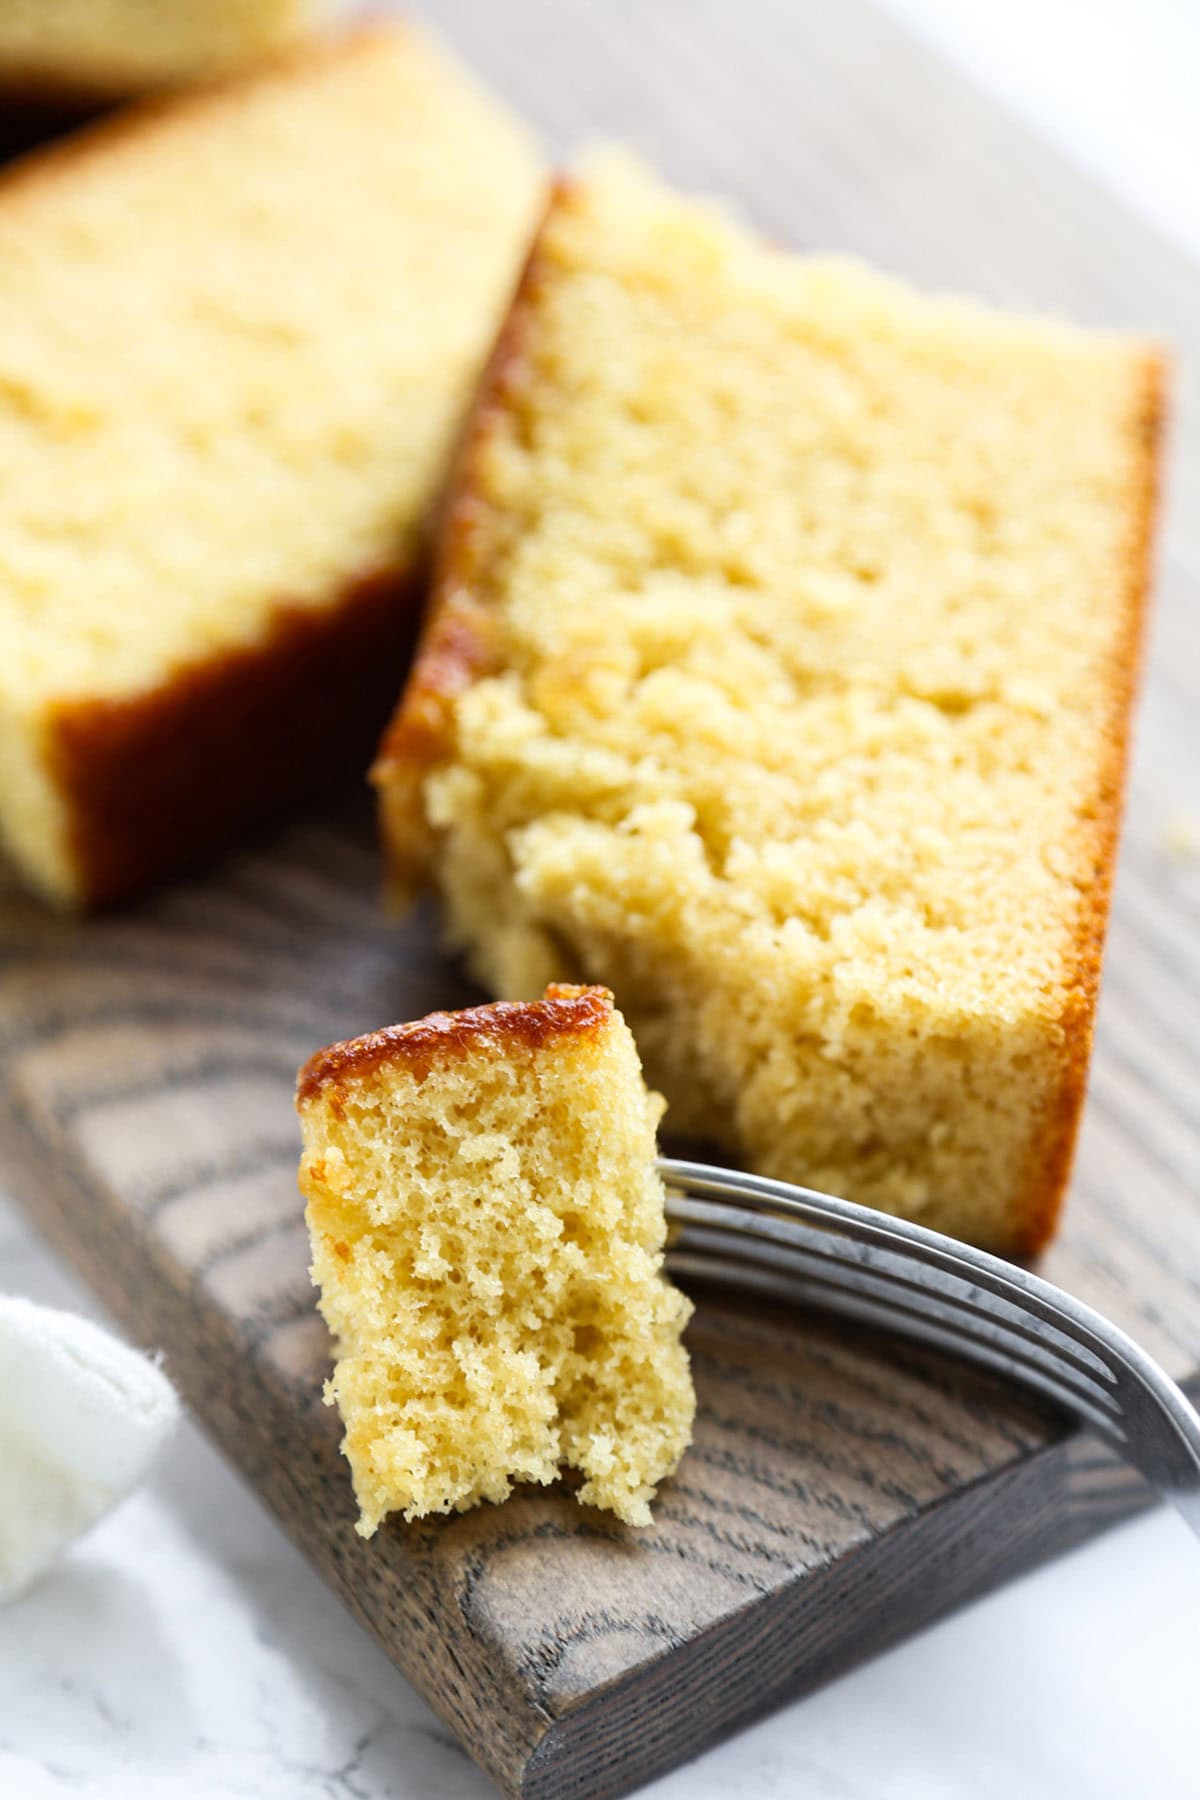
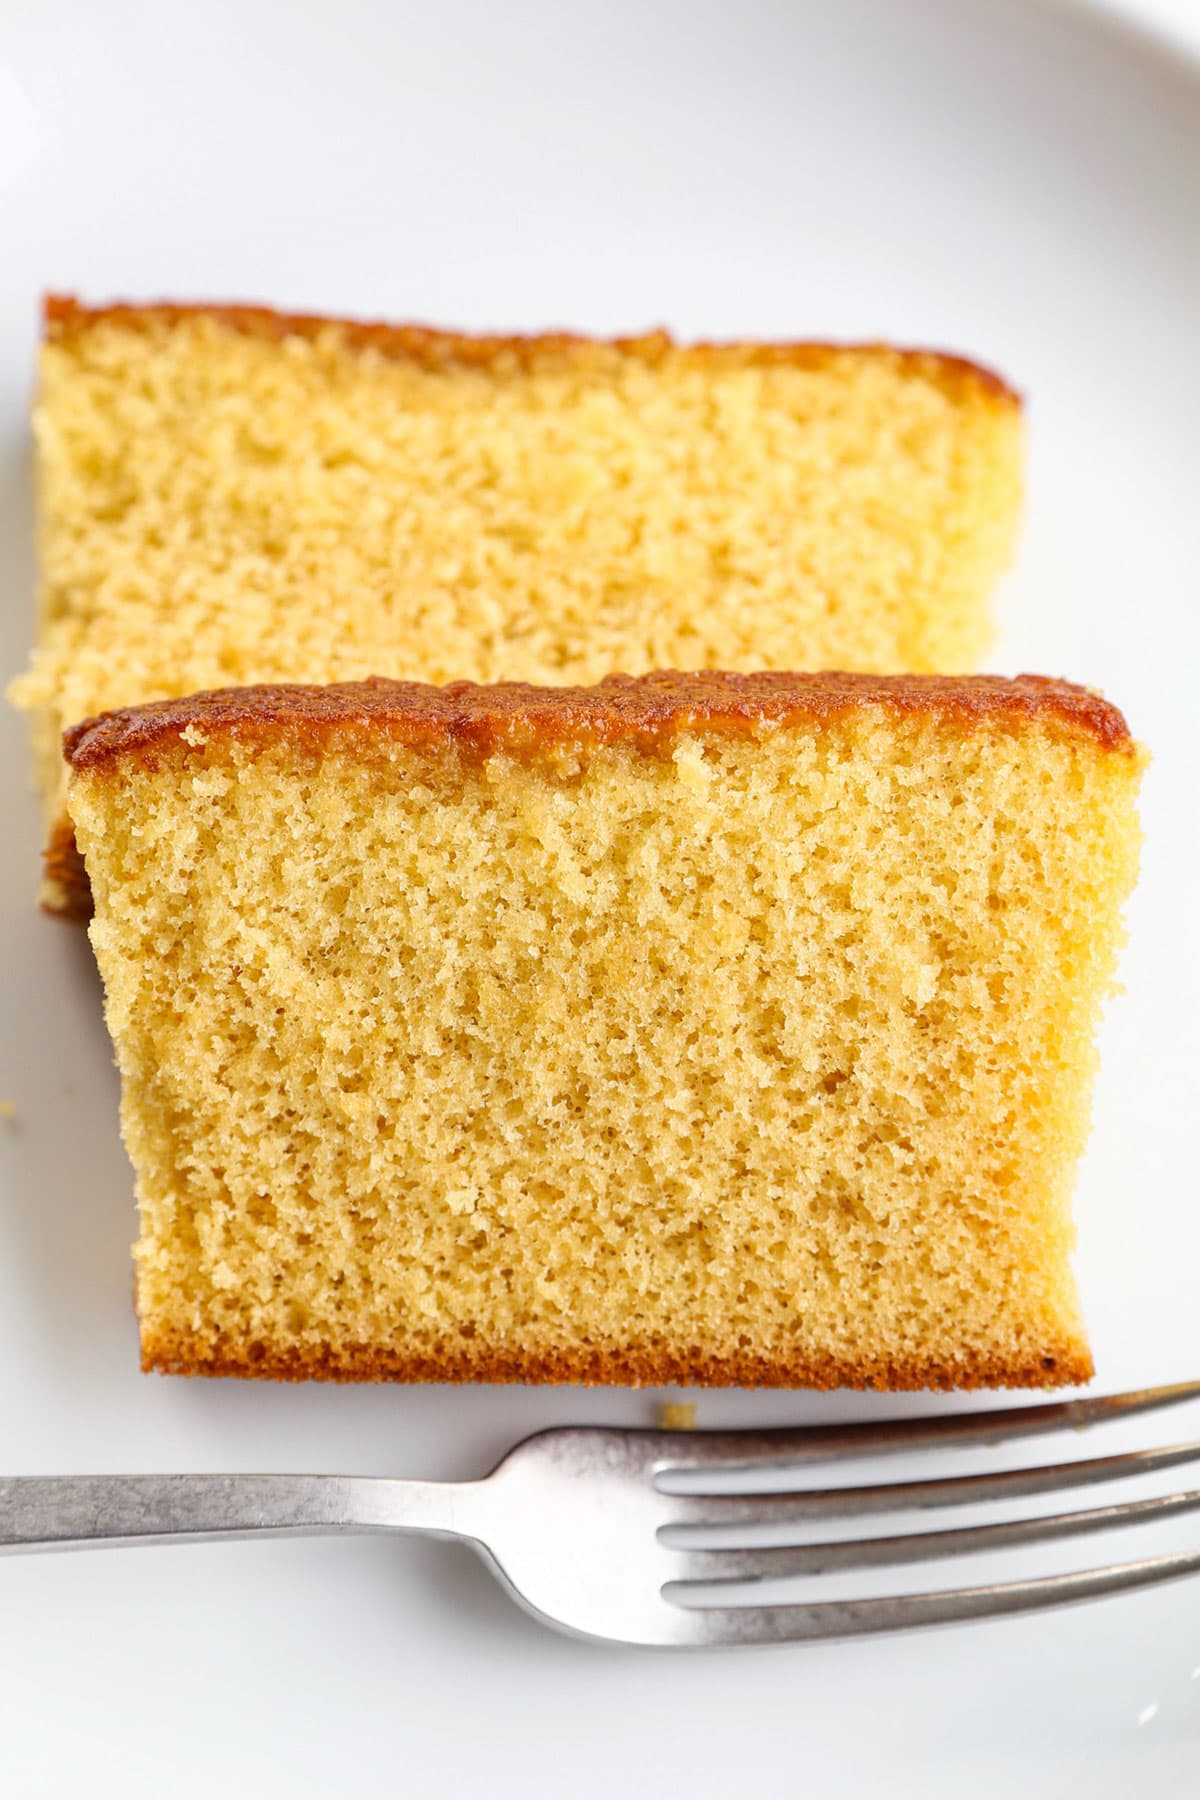
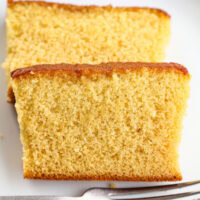
- Slice and serve. Slice off the brown sides of the cake, but leave the top and bottom as is, and cut the cake into 1-inch thick slices. Enjoy!
Expert Tip
To easily test the doneness, stick a wooden skewer or toothpick in the center of the cake – if it comes out clean it’s fully baked. If not, leave it in the oven for an additional 5 minutes and do another skewer test.
What to Serve with Castella Cake
Castella cake is usually served on its own but you wouldn’t be going overboard if you added a scoop of vanilla ice cream. It won’t be too sweet, I promise. Here are some drinks I love serving with castella:
Storage
Keep leftover cake in a food storage container with an airtight lid.
- On the countertop: up to 5 days.
- In the refrigerator: up to 10 days.
- In the freezer: up to 6 weeks
Frequently Asked Questions
Wrapping castella cake in plastic wrap and resting it does two things. It gives the cake some time to absorb the honey mixture you brush on while its hot. And it locks in the moisture, while retaining a fluffy, spongy texture. I know it’s tough to wait, but I highly recommend waiting for the most developed flavors and best texture. I bake this in the evening and let it rest overnight, so I don’t obsess over how soon I can take the first bite.
It’s imperative that the eggs are beaten with the sugar until they are light, fluffy and thick. This usually takes about 5 minutes with a hand mixer. If the eggs are under-beaten, the cake may turn out less spongy and more dense. I also make sure to sift my flour before incorporating it into the batter.
Did you like this recipe? Are there changes you made that you would like to share? Share your tips and recommendations in the comments section below!
PrintCastella Cake – カステラ
This popular Japanese sponge cake only requires 5 ingredients and minimal prepping. Honey lovers, you are in for a treat!
- Prep Time: 15 minutes
- Cook Time: 40 minutes
- Total Time: 55 minutes
- Yield: 8 slices 1x
- Category: Desserts
- Method: Baking
- Cuisine: Japanese
- Diet: Vegetarian
Ingredients
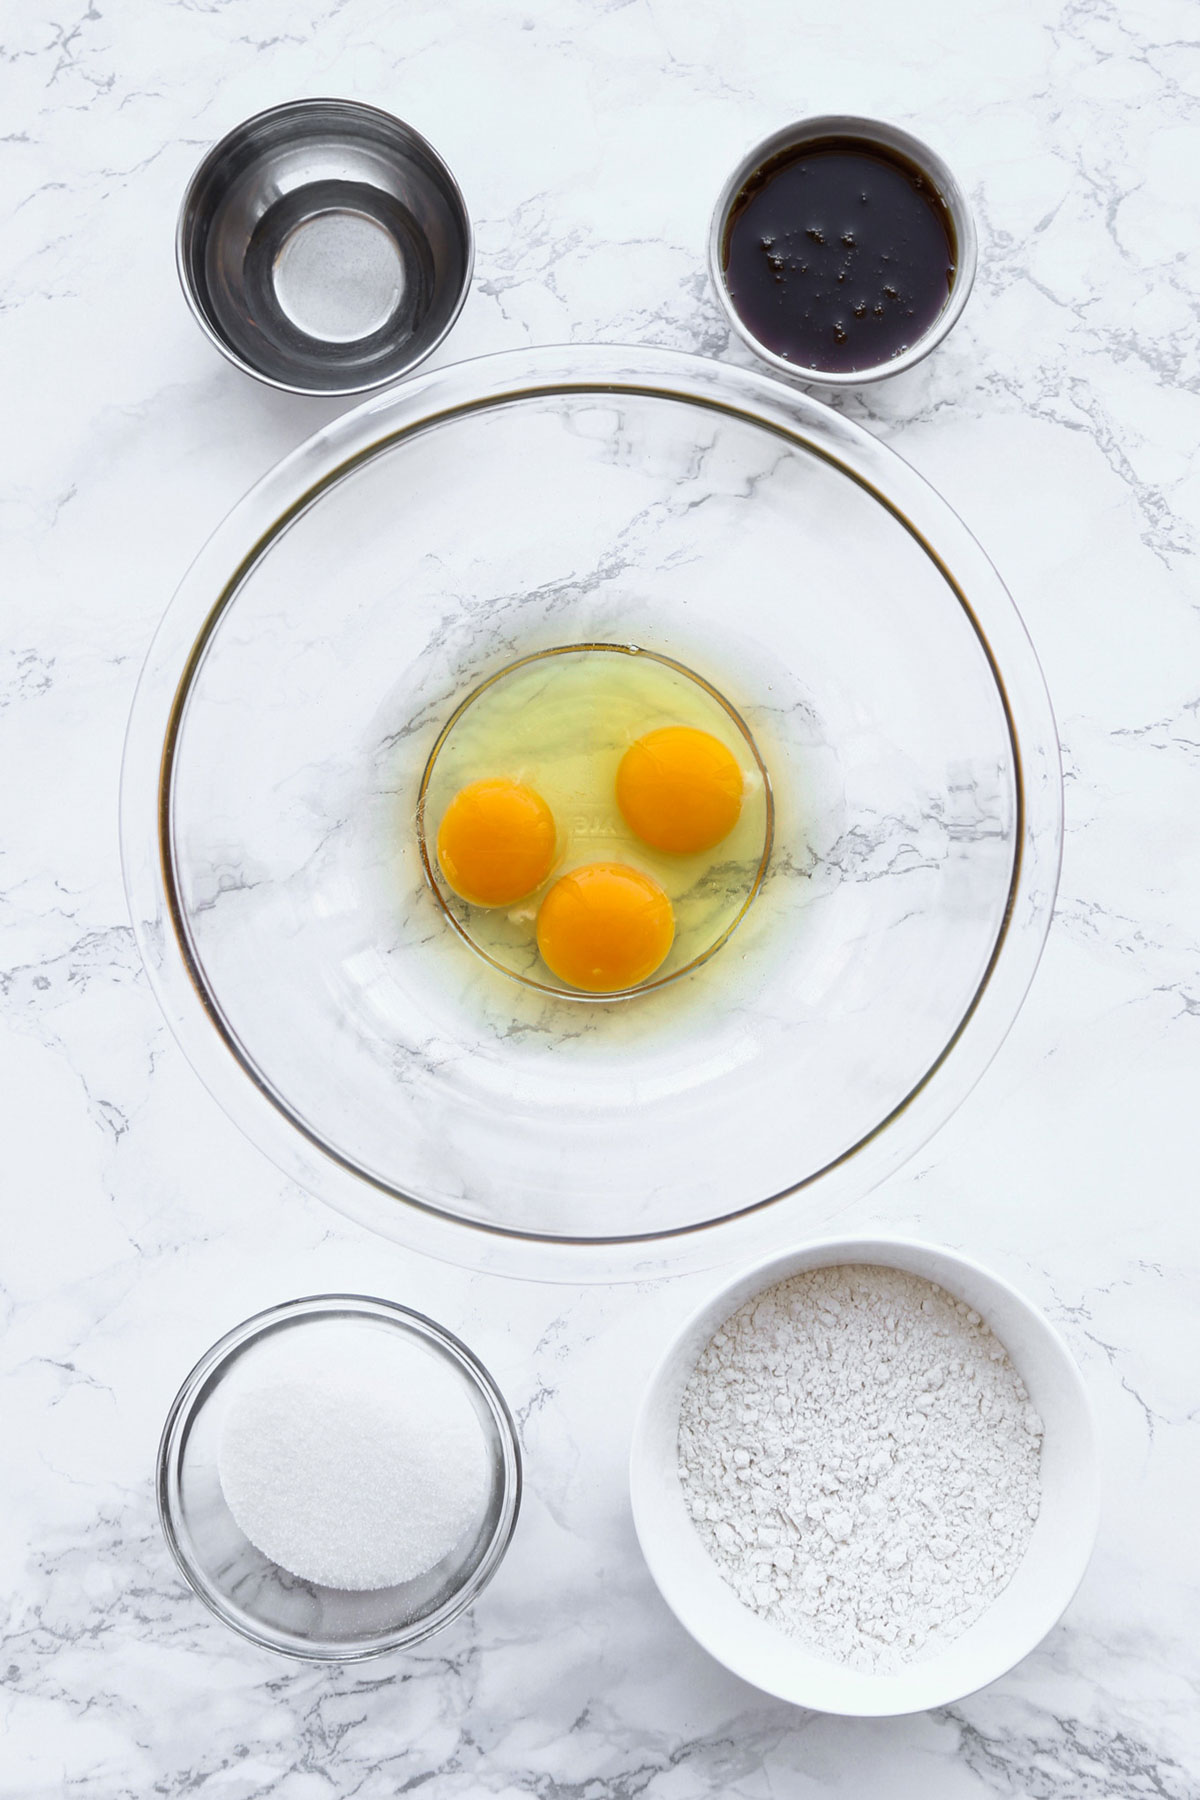
- 3 large eggs, at room temperature (do not use cold eggs)
- 100g bread flour (about 2/3 cup)
- 1/4 cup + 2 tablespoons (about 90ml) granulated sugar
- 60ml honey + extra for brushing
- 1 tablespoon water
- Pinch of salt
Instructions
- Prep. Preheat the oven to 320ºF (160Cº). Brush the bottom and sides of an 8”x 4″ loaf pan with oil or use a cooking spray.
- Sift flour. Sift the bread flour in to a large bowl and set aside.
- Make the cake mixture. In a separate large bowl, crack the eggs and mix using a hand mixer. Then add the sugar and mix on high speed for about 4-5 minutes, until the color turns a pale yellow and the texture has thickened. Turn the speed down to 3 or 4 and add the honey, water, and salt. Mix for 1 minute.
- Slowly add flour. Add about a third of the bread flour and mix until combined. Repeat the same step until all the flour has been used. The entire process shouldn’t take more than a minute or so.
- Transfer the batter to a loaf pan. Pour the batter into the loaf pan and tap it a few times on the counter to remove some of the air bubbles.
- Bake. Bake in the middle rack for 35-40 minute, until golden brown and fully baked. To test the doneness of your castella, stick a skewer in the center of the cake – if it comes out clean, it’s ready. If not, bake for an additional 5 minutes.
- Brush with honey. Once fully baked, take the cake out of the oven and place it on the stove top. Mix 1 tablespoon honey with 1 teaspoon water and brush the mixture on top of the castella cake.
- Wrap the cake. Flip the cake over using a plate and transfer it to a plastic bag while it’s still hot. Fold the bag so that all sides of the cake are pressing against it – alternatively you could wrap the cake in plastic wrap – and leave it on the counter for 12 hours.
- Slice and serve. Slice off the golden brown sides of the cake – except for the top and bottom – and cut 1-inch thick slices. Serve.
Notes
For leftovers: Leave the cake in a storage container with an airtight lid to prevent it from drying. It should keep for about 4-5 days on the kitchen counter, or 8-10 days in the fridge.
Freezing: Wrap each slice individually and save them all in a storage bag or container with a lid. Freeze for up to 6 weeks.
Nutrition
- Serving Size: 1 slice
- Calories: 141
- Sugar: 18.4g
- Sodium: 318mg
- Fat: 2g
- Saturated Fat: 0.6g
- Unsaturated Fat: 0.4g
- Trans Fat: 0g
- Carbohydrates: 27.5g
- Fiber: 0.3g
- Protein: 3.9g
- Cholesterol: 69mg


Hi folks!
I made the recipe as described, and I *must* recommend you use 9×5 pans. The pans called for in the recipe (8×4) overflow a bit, and don’t support a nice top at all…mine sank in the middle, and I’m pretty disappointed! If I had a do-over I’d use a larger pan – the cake would be shorter overall, but it also wouldn’t dip in the middle!
I tried out this recipe a couple days ago, and it was excellent! A lovely cake to have a slice of with coffee for breakfast. I was craving this kind of cake after seeing it in a Japanese bakery, and even though I used all-purpose flour, it still hit the spot. It was just the right amount of sweet, spongey, and fluffy.
I did not sift the flour (never do, I usually don’t find the difference noticeable), and used an 8×4 inch rectangular pan. It was done at 35 minutes for me. I turned the cake out onto a plate but regretted it, as the top crumb layer of the cake stuck to the plate, which subtracted from the beautiful appearance of the cake when it first came out of the oven. I scooped up the crumbs and glaze from the plate and tried to spread it out on top of the cake so it wasn’t so bare, and it looked alright. Next time, I will turn the cake directly out onto the plastic wrap and skip the plate. The cake also refused to come out even after loosening the sides until it had cooled for a few minutes, so the part about transferring “while the cake is still hot” was not possible this time.
It lasted 4 days on the kitchen counter in an airtight container, though after the first day the top of the cake (where I’m guessing the most glaze was concentrated) became very mushy and did not taste good. I cut the top half centimeter off the cake when serving after the first day to avoid the mushy part.
I will definitely make this again. Please let me know if anyone has tips to stop the top of the cake from getting mushy beyond day 1. Thank you for this recipe!
Hi Caroline, your cake looks amazing. I can’t wait to make it! Just a question on after brushing the honey after the cake comes out from the oven followed by flipping the cake out and wrap it in cling wrap, does it mean the top of the cake will be sticking to the cling wrap? Which side of the cake needs to slide off after 12 hours? Also I believe I have 9 x 5 inch pan too, if I want it to get the same look as yours, will it be 1.5x of the recipe provided? Will the temperature needs to adjust accordingly too? Thanks in advance. Mich
Hi Mich! The cake will absorb the honey so it doesn’t stick to the cling wrap at all 🙂 As far as measurements for a 9×5 pan I am not too sure… I think 1.5x might be too much so I would personally stick to the original measurements or increase them all by a quarter at most. The temperature should be fine as it is in the instructions 🙂 I hope you enjoy it!
Why are you set u[p so your recipes can not be saved to Pinterest?
Hi Michael! The website is being redesigned so the Pinterest option has been temporarily disabled. It will be back up soon 🙂
Hi! How can I change the ingredient amount for an 8 inch round pan?
Hi Van, I think a 9-inch round pan would be closer to the actual conversion. But I still think it would work, you might need to adjust baking time to make sure it doesn’t overbake or underbake. Let me know how it turns out! 🙂
Hi, this cake looks amazing and I plan to make it one day! I only have a 9×5 inch loaf pan, though. Do you recommend any alternations so I can use a 9×5 pan or should I just buy the pan you used? I was thinking of just multiplying all of the ingredients by 1.5 and then keeping the temperature and bake time the same, but I would like to hear what you’d recommend. Thank you.
Hi Shizu! I think using a 9×5 pan will work just fine. The cake won’t be the exact same shape as the pics on my blog but the taste will be just as good 🙂
This cake is to die for, our family have made this for a long time. Actually thought it was a secret recipe :O) didn’t realise you could freeze it so now i know. thanks
I would like to make this recipe into cupcakes instead. How long should I need to cook for??
Hi An, I’m not sure about cupcakes but my guess is that it would take about the same amount of time that a regular cupcake would take – so probably 15-20 minutes.
I baked in a cupcake pan for 20- 23 minutes and it came out perfect! Everyone in the family loved it especially my kids! Thank you so much for sharing this recipe. I always wanted to try making Castella. This one is very simple and tastes good too. Definitely one of my favorite recipes now!
Thank you so much An! and I’m so happy your kids loved it too! 🙂
My husband is also half Japanese and grew up eating this cake. He’s very specific about the taste and texture of this cake. I’ve made it now 5-6x and he says it’s almost identical to what he grew up eating.
Room temp eggs is a must and mixing long enough to get a little thicker. I skip the glaze part since each time I’ve tried it, it hasn’t come out the way I’d hope. However, the cake is excellent without it. I do wrap in Saran Wrap and leave for 12 hours before eating.
Thank you for this recipe – it’s a family favorite with my 2 kiddos too.
Wonderful Christine! I’m so happy it’s a family favorite 🙂 ❤️
This was a truly delicious cake! The honey flavor is distinct without being overpowering and the cake is moist. Mine came out slightly chewy as I used the wrong sized loaf pan (too big, so the cake is flatter) but even with that mistake, it is an incredible cake I will now add to my rotating repertoire!
So glad you like it Zoe! Thank you for sharing your cooking experience 🙂